Pages

xx Thanks for taking the time to visit my blog - your comments are all greatly appreciated xx

Friday 28 December 2012

Party Animal


Well that's it for another year, hope all of your festivities went smoothly?  No burnt turkeys, brussel sprouts like bullets or yorkshire puddings like frisbies!  Did Santa bring you everything on your list?


I'm sure that you're all ready to relax after a few hectic days so we've got a new challenge starting over at Fussy and Fancy today to help you get back into your crafting.  So why not stick the kettle on, take your cuppa to your craft space and pop and have a look at the DT's inspiration?

I bet everyone's like me and has loads of stamps lurking that have never been inked, well this is one of mine!  I bought it with all good intentions and then, yep, there it sat until now....


Materials used:
Stamp & sentiment - party animal
Coloured with promarkers
Glamour dust - crystal
Sentiment - Jane's script
Nestabilities - splendid circles
Distress ink - barn door
Ribbon - carnival collection


I'd like to enter my card into the following challenges:

Really Reasonable Ribbons - anything goes
Charisma Cardz - anything goes
Pixie Dust Studio - celebration
Divas By Design - anything goes
Paper Shelter - anything goes
Crafters Companion - winter friends


xx Happy crafting and glittery hugs xx

Monday 24 December 2012

Merry Christmas


Merry Christmas to everyone busy blogging!!


I hope that you have great celebrations planned or just a peaceful and healthy crafting time.

My thoughts go out to those that are less fortunate and also to those of you that are suffering from ill health.

Fingers crossed that you are all able to spend Christmas in your own homes and that you haven't been driven out by the floods.

Whatever you're doing and where ever in the world you are, please stay safe!


xx Happy crafting and glittery seasonal hugs xx

Saturday 15 December 2012

Winter Chloe


This is a virtual post today as it's a busy weekend for me!  It's my partner Marks 50th birthday and he has no idea what I've got in store for him (mwah ha ha ha).  I can't say too much yet just in case he reads this but hopefully he'll like everything and if I remember I'll take some photos to show you all!

As you may know I love getting all inky and making this card was no exception.  To make the background for this card, in true crafting style, I was using the ink left on my splodgemat from another project so I didn't waste any!  I brayered it onto my card working around each edge into the centre, spritzed it with water, placed some creased cling film on and left it to dry before removing the cling film to reveal the mottled effect.  After adding the tree branches I then stamped the snowflakes using versamark and brushed with silver mica powder and with a quick spray of hairspray they were there to stay.  A quick flurry of glamour dust for the snow on the branches and a chance to play with my fluffy stuff and voila......


This card is a reminder for the challenge currently running over at A Gem of A Challenge where the theme is "Lavender and Lace".  Can you tell I had fun making this?


This digi stamp doesn't come sitting on the bench but she begs to be sat on something doesn't she?  So I masked her up and, using one of my other stamps, made somewhere for her to sit in the snow.

Materials used:
Digi - winter Chloe
Coloured with promarkers
Glamour dust - crystal
Stamp - tree
Mica powder - pearls
Background created using:
Adirondack ink - wild plum and denim
Krylon leafing pen - silver

I'd like to enter my card into the following challenges:

Papertake weekly - snow white
Stamping Sensations - treemendous
Try It On Tuesday - let's get inky
The Stamp Man - in the bleak mid winter
Stampin For The Weekend - let it snow


xx Happy crafting and glittery seasonal hugs xx

Tuesday 11 December 2012

What a cracker (plus tutorial)...


14 more sleeps to go, 14 more sleep 'til Santa.....


Have you made any Christmas decorations this year or have you just been concentrating on your cards?  Well here's an idea to either brighten up your Christmas table or your mantel piece.  I've even included a tutorial of how to make them so all of the hard work has been done for you, you've just got the fun bit of making and decorating them in your own style.  Why not email me a picture of your finished cracker (email in the side bar) and I'll add the photo to the bottom of this post?

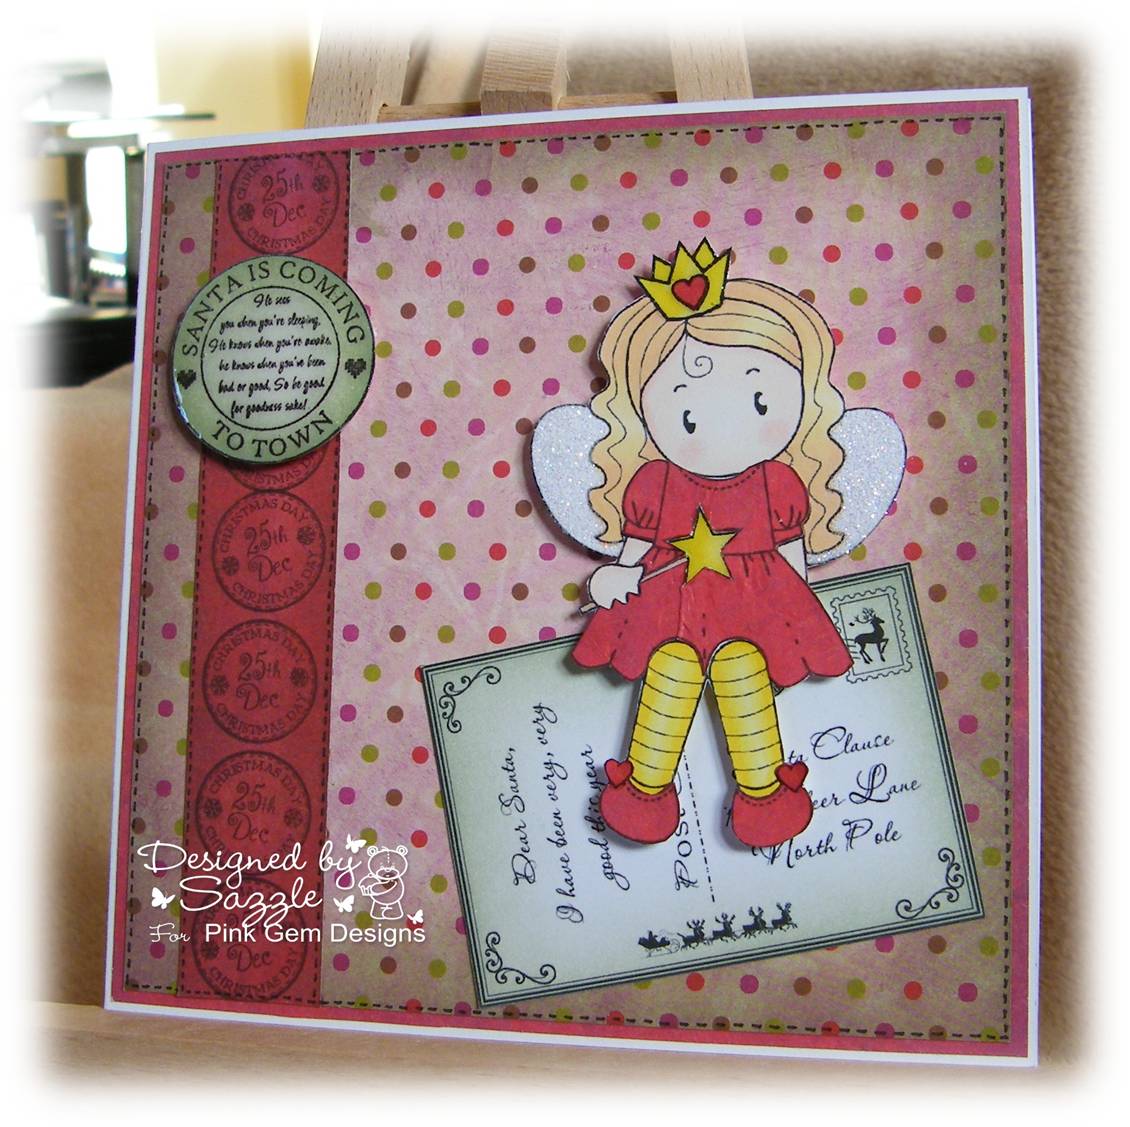
Here's my cracker using a design which is less traditional, but still as much fun to make  You could always put a little gift inside before you tie the ribbons at each end or insert the cracker strips to create the band when you pull it open too!


Materials used:
Digi - robin set
Coloured with promarkers
Glossy accents
Digi papers - coconut ice
Printed onto card
Sentiment - vintage Christmas sentiments
Distress Ink - victorian velvet
Ribbon - carnival collection
Pearls from my stash

I'd like to enter my card into the following challenges:

I Love Promarkers - anything goes
Whimsy Stamps - anything festive
Joanna Sheen - with love at Christmas
Emerald Faeries - Christmas
Cupcake Craft - merry Christmas
Fashionista Challenge - winter
Hooked on Craft - Christmas
Love To Create - anything goes
Cutie Pies - cutie Christmas
Dream Valley - Christmas
One Stitch at a Time - more than one fold
Ribbon Girls - ho, ho, ho


If you'd like to make your own crackers I've included a tutorial below! As I said above I thought it would be nice to share a gallery of them, so if you'd like to show your finished cracker along with this tutorial please send me an email (email in the side bar) and I'll add it to the bottom of this post.

Right here we go...

********

Materials needed:

1 x piece of A4 card (plain or decorated)
Hougie board (or similar with cm measurements)
Ruler & pencil
Craft knife (or scissors)
Cutting mat
Double sided tape (or glue)

1)  Take your A4 piece of card and place it right side down onto your Hougie board in a landscape orientation.  Working from the left hand side score down the narrow edge at 2cm, 5cm and 8cm.  Turn the card around and repeat at the other end (see diagram 1 below).  Alternatively measure the intervals with your ruler, mark lightly with a pencil and use a scoring tool

DIAGRAM 1 (click to enlarge)
2)  Do not fold your card at this time as it makes it easier to complete your other measurements (believe me it's tried and tested!)

3)  Leaving your card right side face down but this time in a portrait orientation on the Hougie board, you now need to work from the left hand side and score along the long edge at 6cm, 12cm and 18cm (see diagram 2 and 3 below)

DIAGRAM 2 (click to enlarge)

DIAGRAM 3 (click to enlarge)

4)  Do not fold your card at this time as it makes it easier to complete your other measurements (believe me it's tried and tested!)

5)  That's the work done with the Hougie board, now you need your pencil and ruler

6)  With your card in a landscape orientation, starting at the left hand side and working on the previously scored 5cm line along the narrow edge, you need to measure and mark intervals at 2.5cm, 3.5cm, 8.5cm, 9.5cm, 14.5cm, 15.5cm and 20.5cm starting your measurements from the top of your card.  Turn the card around and repeat at the opposite end (see diagram 4 below)

DIAGRAM 4 (click to enlarge)
7)  As per diagram 5 below, match up the intervals on the 5cm line with the sections where the horizontal and vertical 2cm and 8cm lines cross.  This is easier to understand by looking at the diagram than it is trying to explain to you.
8)  You should now have diamond shapes on your card which need to be cut out and discarded (see diagram 5 above)
DIAGRAM 5 (click to enlarge)
9)  You now need to fold your card to form the cracker shape (see diagram 6 below).
DIAGRAM 6 (click to enlarge)
10)  Place either double sided tape (if you're feeling confident) or wet glue ( if you want to be able to adjust it) along the narrow edge (see diagram 6 above).  Where the folds overlap to form the join the cut out pieces should match it you have followed the instructions carefully.

11)  All that's left to do now is to decorate your cracker

Here is another example of a cracker where I've used pearlescent card and a small holly berry stamp to create the card base and then used a contrasting paper to highlight.


I'd love to see your projects, who's going to be first in the gallery?

CHRISTMAS CRACKER PHOTO GALLERY


Please feel free to reference this tutorial, along with your project on your blog and any craft sites but PLEASE spare a thought for the time and effort that has gone into producing this and a link to this tutorial would be very much appreciated.


xx Happy crafting and season glittery hugs xx

Saturday 1 December 2012

Fairy Chloe


Welcome to December crafty friends and only 24 days left to do all of your present shopping and to finish off all of those Christmas projects too.  How many cards do you have to make?  Do you make them for everyone or only those close to you?  I usually make cards for Mark (my knight in shining armour) and my daughter, everyone else gets a shop bought card.  I know the card police will be after me but I just don't get the time to make one for everybody, I wish I did!


Anyway, less of my woes and onto today's card which is a reminder for the current challenge running over at A Gem of a Challenge.  The host for this challenge is Debbie and she's chosen paper piecing as her first challenge.  Now this isn't a technique I use very often, but I had great fun making this card and got completely covered in glittery too!

I love using digi stamps as they can be resized to suit your project and elements can be moved within the image as well or even removed.  Santa and his reindeers were at the top of the postcard but would have been hidden by this lovely fairy so I moved it to the bottom instead.  Hope you like the card I created for my DT submission, but please pop over to the challenge blog for more inspiration from my teamies too.


 Materials used:
Digi - fairy Chloe
Coloured with promarkers
Sprinkled with glamour dust - crystal
Distress ink - bundled sage
Paper - Miton & Co - Xmas pack
Stamp - calendars

I'd like to enter my card into the following challenges:

I Love Promarkers - anything goes
Passion for Promarkers - distressing
Whimsy Stamps - traditional Xmas colours
Creative Inspriations - traditional Xmas colours
Crimbo Crackers - anything goes
Paper Crafting Journey - case a DT card (Linda GDT)
Divas By Design - glitter & sparkle
Paper Shelter - Christmas
Creative Card Crew - anything goes


xx Happy crafting and glittery hugs xx